By Pauline Weston Thomas for Fashion-Era.com
- Shoebox Ideas for Kids
- Shoebox Scenes
- Shoebox Scenes Instructions
- Shoebox Scene Picture
- Holiday Cards
Shoebox Scenes
After Christmas, it always seems a shame to throw away old Christmas cards that can be reused. Either the cards can be processed by charities to make new cards, or they can be cut up and made into fantasy Shoebox Fun Scenes.
I loved making these as child and I have made them on many occasions when baby sitting for friends. I recall posting this idea many years ago on the mostly American Fibercrafts CompuServe forum and none of the very craft oriented Americans there had ever heard of it.
But I'm sure many people have done this before. I believe the idea we used, came from an American sugarcraft egg my aunt was given by a G.I in the Second World War. The crystal sugar egg had a scene inside and once a year it would be brought out at Easter so we could all marvel at it. The scenes made in shoeboxes are similar in concept.
Children invariably can find loads of old birthday, Easter or Christmas cards if you ask them to look and will happily give up that old shoebox they use to store secret items if they think you will actually spend the time to make something with them. Just make sure you have a glue stick in your handbag!
All types of greeting cards even gift tags can be used to make such boxes. You can take a very artistic view and make them all of one type such as a winter wonderland scene with snow scenes and skaters only. Or you can do as I have (much easier readers) as in my example and just mix up the Xmas images, including one of everything that children associate with Christmas such as a nativity scene, father Xmas, a decorated tree, 3 Kings, gift wrapped boxes, stars, holly, maybe a reindeer grazing, a snowman and candles. Children are more than likely to add any and everything anyway. You can do amore sophisticated decoupage version if preferred.
Shoebox Scenes Instructions Making a Leftover Greeting Card Shoebox
What You Need to make your Shoebox
- you need an old shoebox, with or without a lid.
- A glue stick such as a Pritt stick
- Some gift-wrapping paper
- Some clear plastic film such as overhead projector film
- Tissue paper as an alternative lid.
- Possibly some aluminium foil
- Lots of unwanted Christmas or other greetings Cards
- Several small pairs of scissors such as pointed nail or embroidery scissors
N.B Cutting the Cards
Before you cut your cards do make sure that the children understand that every card must have a lip of about 1cm below the motif selected, so that it can be bent back and stuck to the shoe-box base.
Let the children cut out the card shapes whilst you deal with the box.
Deal With The Shoebox
Method 1
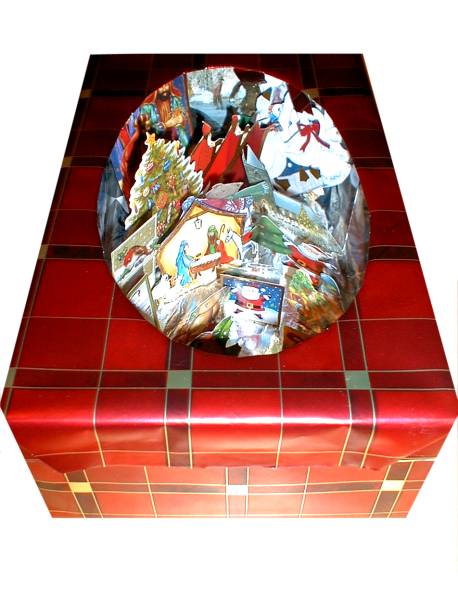
Next cut an oval out of the shoe-box lid for light. On the inside of the lid use a glue stick to stick down some OHP film.
Method 2 For a box without a lid you can cut a square out of the one short end of the actual shoebox and either leave it open or add OHP film to the opening. The no-lid shoebox will finally be covered with white tissue paper.
Next, line the inside of the box with aluminum tinfoil, or if you have several of one kind of card such the Victorian skating scene I used, line the box with one type of card.
Now put gift wrap on the outside of the box. Next cover the lid, but clip the paper up to the cut oval. Neaten it inside with another piece of paper.
Assembling Your Scenes in Your Shoebox
Now gather together all the cut shapes such as poinsettias. Bend back a lip and just roughly arrange them in the box with the tallest pieces of card at the back and the smallest units at the very front.
Stick them down using a glue stick. If you used method 1 add your lid to your magic box. If you used method 2 now cover the box with a very thin sheet of white tissue paper.
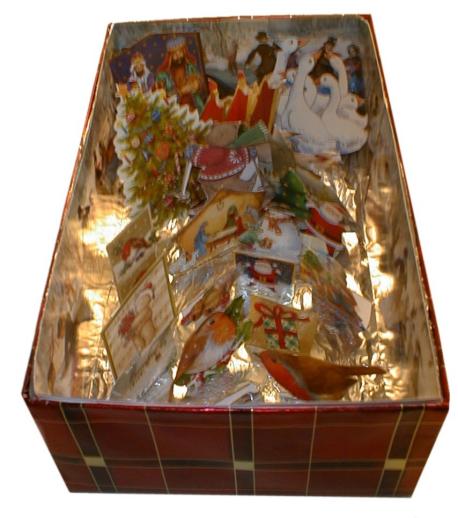
Admire your work as you hold it up to the light. In the picture below there are no lights in the box, but the floor of the box is lined with foil which does make a shimmer. The scene in method 2 is slightly harder to view, but has a magical quality to small children - Ok even my husband!
Shoebox Scene Picture