By Pauline Weston Thomas for Fashion-Era.com
Table of Content
- Choosing Velvet 'Pile' Types of Fabric
- Velvet
- Velvet Nap
- Velveteen
- Corduroy
- Devoré Velvet, Burnout Velvet, Broderie Chimique, Voided Velvet
- Next Pictures of Winter Fashions
- Panne Velvet
- Caring for Velvet Items
- Steaming and Pressing Velvet
- Velvet Sewing and Pressing Tips
Velvet in Fashion 2005-2006
Velvet has been big fashion news since autumn winter 2005/6 and you can expect to see more it for autumn winter 2006/7. This picture is typical of a high-street fashion evening gown from Dorothy Perkins autumn 2005 collection and using velvet.
You can read more about the weave structure of velvet and pile fabrics and how to care for velvet below.
Velvet Evening Gown

This fabulous velvet gown from Dorothy Perkins was part of their autumn 2005 range and the thumbnail image is courtesy of Arcadia.
Choosing Velvet 'Pile' Types of Fabric
Firstly recognise that velvet is often confused with velveteen, panne velvet and corduroy. To these names you can also add finishing processes known as devore and burnout velvet or flock and embossed velvet which can confuse even more.
Basically velvet, velveteen, velveteen, panne velvet, and corduroy are all pile fabrics that stand up from the back of the cloth. The surface of the fabric is a series of loops which can be cut or left uncut dependant on method of manufacture or end product. An uncut pile fabric will have a pile surface whereas a cut pile fabric will have a nap surface.
Pile fabrics can be made by weaving, knitting or tufting. Similar techniques are used in carpet construction and towelling can be made from cut or uncut (loop) warp pile.
- Velvet has cut loops from warp pile.
- Velveteen has cut loops from weft pile.
- Corduroy has cut loops from weft pile.
Velvet Weave
Velvet has a very close and dense pile. There are several methods of weaving it, but for centuries it has often been woven as a double cloth. In this method the warp yarns are specially woven as shown in the picture below. The warp loops are formed over wire rods. Next the loops are cut during the weaving process. The double cloth is then separated and processes begin which help the bloom of the velvet to develop. After dyeing it is sheared or cropped even further to make it level.
Then it is brushed so the cut threads splay out and stand up from the surface backing. Steaming gives the velvet the bloom that makes the fabric so appealing. The finished dense piled cut fabric is called velvet. People either love or hate the texture of velvet. Men often find the texture of velvet on a woman very alluring.
Face to face (back) method of weaving cloth, where the knife cuts through the middle during weaving to produce 2 separate layers of velvet cloth.

Velvet can be made from silk, rayon, nylon, polyester or cotton. I like silk, silk with viscose and cotton velvet the most. Silk or silk viscose mixes are usually luxurious, soft and flowing and very suitable for evening wear as they drape exceptionally well.
They are though slippery to handle and more difficult to sew than cotton velvet or velveteen, so read my tips for sewing and pressing velvet.
Cotton velvet is hard wearing and tailors well for daywear. Velvet is best dry cleaned. Pile velvet, corduroy and velveteen should never be pressed in the normal way of ironing. They are all are best carefully teased and steamed with a velvet board, kettle and special pressing instructions as stated below.
Velvet Nap
A cut pile fabric is said to have a nap surface. This nap surface is one factor which makes construction of velvet items more difficult in both industry and at home.
An item needs all the pieces to be cut in one direction. If you cut with the nap the item will feel smooth in wear as you run your hands down a garment. Cut against the nap and the colour will be deeper, richer and more luxuriant in appearance. The most important point is that every piece of a particular garment runs in the same direction.
When shopping for velvet items watch out that every section of the garment runs in the same direction. Heavily reduced items early in the season and in seconds shops often have one sleeve or skirt panel put in in the wrong nap direction causing a shading difference.
Velveteen
Velveteen is mostly made from cotton and the weft pile loops are cut short. It is not so expensive as good velvets, but quality velveteen can be quite luxurious and even hardwearing. After weaving and brushing and cropping dye is applied by brushes which all help add the lustre and bloom peculiar to this cloth. Velveteen looks like velvet, but lies much flatter, but all of the pieces of one complete outfit must still be cut in one direction.
Velveteen has similar effect to velvet in appearance and can make the wearer look slimmer than when wearing velvet. However velvet usually looks much more expensive. For sewing, velveteen also has a little more body so is much easier to sew. Velveteen is also easy to launder and can be washed at home and given a short spin. It dries very well in front of a gas fire or radiator which can bring up the pile.
Velveteen is mostly made from cotton with weft pile loops are cropped very short to no more than 2mm.

Corduroy
Corduroy is made mostly from cotton. Long wefts span several warp and when the weft is cut it creates the familiar high raised lines or cords with fine backing fabric lines between. The cords lines run the length of the warp. Like velvet, corduroy should be cut in one direction only when making a garment or using heavier elephant cords in upholstery.
This material is used to produce casual wear such as trousers, jeans, caps and jackets. It often has other names such as corded velveteen, elephant cord, pin cord, Manchester cloth as it was produced as a Manchester cotton textile and worn originally by poorer workers in the same way that fustian was used. Manchester cloth was very good quality with dense pile but is virtually impossible to obtain today. Cotton corduroy today is often mixed with Lycra to make the fabric easier to wear and retain shape.
Corduroy wefts span several warp, but the cut weft creates the familiar high raised wale cords.

Devoré Velvet, Burnout Velvet, Broderie Chimique, Voided Velvet
Devoré velvet or burnout style used to be called broderie chimique and is best pressed with the pile sinking into that special pressing velvet cloth described above. Needle boards can damage the sheer elements of devoré fabric and snag and create pin holes. Always try out pressing techniques on inexpensive items that you have no love for. Velvet boards can be obtained at internet haberdashery supplies stores. Note - sometimes this is also called voided velvet.
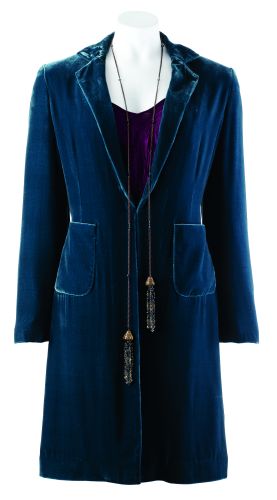
Velvet, Devore & Printed Velvet
Purple Velvet Jacket - With satin tie fastening. £64.99, 82% viscose 18% silk. Lining 100% polyester. Dry clean. Sizes 6 - 20 Length 22"/56cm. (951-014-X36)
Purple Velvet Devoré Skirt £44.99, 82% viscose 18% silk. Lining 100% polyester. Dry clean. Sizes 6 - 20 Length 27"/68.5cm (957-680-X36)
All items available from NEXT stores in UK nationwide & NEXT Directory on 0845 600 7000 and online until Dec 2005 @ www.next.co.uk
Garments only available until end December 2005. These thumbnail images are all courtesy of Next

Panne Velvet
Panne velvet and panne velour are a knit velour velvet fabric in which the surface pile is directionally flattened. On occasion it comes into fashion, but is often used to portray vamps in dramatic productions as it has cheaper look to it. It is very comfortable to wear as it is knit fabric and has incredible drape for cowl and bias cut dresses.
Caring for Velvet Items
Velvet picks up fluff, lint, dandruff, threads. So often it is black, navy, plum purple or darkest green and all these bits show to the detriment of the fabric. Velvet is beautiful when the appearance is pristine and plush.
Garments can be gently and lightly vacuumed with the special upholstery brush provided with your cleaner. You can also cover the nozzle end with some pantyhose leg and use that if you have no special attachments.
Finally either use a special lint remover, a band of hooked Velcro or wrap scotch or Sellotape around your hand generously and carefully run the tape down the garment to drag off stubborn fluff. If you use the hand method be generous with the tape and throw away and renew it to get efficiency and a clean lint-free surface.
Page Date 5 August 2005, updated Sept 2006.
Velvet Sewing and Pressing Tips
If you cannot sew then buying a beautiful evening dress like this green velvet dress from Phase Eight (available autumn winter 2006/7) may be best for you. I always think bought velvet dresses are worth the money in this case £120 as great care needs to be taken when working with velvet.
But if you can sew you may need some help in getting good results from velvet. Here are my tips for sewing velvet, which may be useful to know in caring for your dress or if you need to shorten a velvet dress.
Sewing velvet can be fraught with problems for both the experienced and inexperienced sewer. There is no doubt it can be tricky to sew.
The fact is some velvets sew like a dream and others do not. If you find for example a black velvet that sews exceptionally well consider going back to the shop to purchase more of that velvet and store it on a fabric roll.
Some people wonder why others have trouble sewing velvet, but it can be a very variable experience. Modern 100% polyester velvet for example is easier to sew, but you may prefer the look of silk or rayon velvet which is more troublesome.
Cotton velvet is good for beginners and so is cotton velveteen. Silk velvet is best tackled when more experienced. By sewing different types you will also then learn which are great value for money when ready made in stores.
Most velvets hang best when they are lined, otherwise the velvet item may 'stick' to the body. A lined garment is far superior in feel and hang to an unlined item and this is especially so for velvet.
Considerations for Sewing Velvet
So if you are sewing velvet for the first time you can have a good experience and garment of your dreams if you treat the velvet with kid gloves during construction. The rules of working with it I give might sound petty, but they do help assure success.
It is also a good idea to use a pattern you have used before or have made a rough mock-up or cotton toile if the pattern is a new one so you know the fitting problems. Then you can make pattern adjustments BEFORE working with the velvet.
You do not want to have to unpick any seams ever in velvet. So knowing that your pattern is a trusty reliable pattern can be 50% of the success of the exercise.
There are several other considerations. These include an understanding of nap, the use of special pressing, steaming techniques, the use of special machine sewing needles, the use of a sewing machine walking foot or special roller foot or using tissue paper plus tacking (basting) and pinning carefully for short times only.
Velvet and Pile Fabrics - With Nap - Without Nap
First assess the nap of the fabric. Nap refers to the direction of pile or directional pattern which may be one way only. With pattern this means roses and stems for example printed all one way would mean the fabric would have to be cut in one direction only. If the roses and stems were upside down as well, then the pattern could be cut both ways, but not if the fabric was velvet or other pile fabric. A two way patterned pile fabric must be cut in one direction only.
In practical terms with pile on PLAIN velvet, velveteen and corduroy nap means 2 things.
Firstly the colour will be different in the other direction so pieces must all be cut one way so no shading mismatch appears in a completed garment.
Secondly, when you run your hand across the pile, one way feels smooth, the other rough. This is also a factor when choosing which way to use the fabric. When I wear a velvet dress I like to be able to feel a smoothness against my hand when I touch the fabric. But if you make the garment up this way you do forfeit a richness and intensity of deep colour, but gain the luxury of the softness of the plush.
When the pile runs up the dress, the fabric colour is deep and intensely rich. I suggest you hold the fabric against your body and check how you prefer it in a mirror to see which direction you prefer to cut it.
So to make the colour and texture look better, cut it so that the pile runs upwards.
To have it feel smoother when stroked down your bodyline cut it down the pile.
The choice is yours, just be consistent with pattern placement direction.
Use a One-Way Single Layout
Velvet then can be cut with the pile or against it, BUT whatever way you choose to cut it, you must cut every piece in one direction with either up or down nap. Use a one-way single layout. I personally prefer to cut velvet from a single layer of fabric. Velvet is mostly woven comparatively narrow compared to modern fabric widths, so it's often just as practical to cut from a single opened out layer rather than using symmetry.
With a single piece one way layout you get even cuts as one layer of velvet fabric if doubled up can slide on top of the other creating sizing differences in the cut pieces. This method takes more time to do, but it's worth it.
Cutting from a single layer of velvet prevents fabric shifting. Luxurious velvets do creep as you work with them so try to be aware of this pitfall. If you use this method you must double check that every pattern piece you turn over is correctly placed.
This does create more work, but with velvet slow and steady wins the race. The main thing is you want to wear the finished item and if you are careless with it, it will be less than perfect and you will regard it as inferior.
For what it's worth even experts find velvet frequently problematic especially around zips. Hand insertion of the zip with prick stitch may solve the problem, especially in bias cut dresses where hand manipulation can ease the fabric that might otherwise stretch and ripple, into line.
The Vogue Sewing Book details how to insert a zip using the hand couture method if your machine inserted zip in technique is poor.
Try either technique on a sample first so that when you do apply the zip you can do it confidently. Once you mark the garment velvet with a ripped out zip, the frayed velvet fibre loss is permanent. There is no second chance to replace fibre pile loss.
Be generous when you cut around your pattern pieces as all too easily creep and fraying can happen before you have even lifted the pieces off the table, so I cut my allowances 2cm rather than the standard 1.5cm allowed on a pattern.
It also gives you a little room to manipulate the basted pieces. Instead of using tailors chalk I prefer to use old fashioned tailor's tacks for markings on these fabrics. Cut all notches generously outwards. NEVER cut them into the seam allowance.
Hand Baste or Tack Velvet Seams Before Machining
I confess I tack (baste) very little in most normal sewing situations apart from tailored collars and sometimes sleeve heads, both of which do need careful setting, especially in unforgiving materials. After years of sewing I mainly sew over pins set at right angles to seams, but velvet is one fabric I do tack (baste). Basting seams helps to achieve a professional finish on velvet.
Work slowly and carefully, not in haste and you will have success. Use a fine silk thread to baste with, as this will mark the material far less than other threads. Velvet picks up impressions quickly. So when you have basted the seam, stitch it as soon as possible and try not to leave the tacking in for hours on end.
The less time the tacking is in place the less imprinted the velvet will be with superfluous marks.
Hand baste every seam carefully with long and short tacking stitches. Long and short tacking /basting stitches will hold fabrics better together than even tacking stitches.
By long I mean about 10 to 12mm and by short about 4 to 5mm. This long and short tacked seam will also hold together better than even basting when fitting. Manipulate the seam you tack by hand. This saves lots of tearing of hair later when the seam might pucker or move up to 2 inches as one layer of velvet pile floats on top of the other.
Some velvets also show pin marks so be careful using pins and don't leave any pins in velvet for anything longer than minutes or you may leave permanent imprint marks.
If you are someone who refuses to baste, then pin within the (generous 2cm) seam allowance and remove pins a couple of inches ahead, but don't expect perfection. Basting velvet really does save time in the long run. Alternatives to hold fabric pieces together include using paper clips, a technique used when sewing suede.
Do little experiments with your fabric scraps.
Stitching Velvet Seams
Before you sew your velvet you must first read how to press velvet and how to not iron velvet here. This is chicken and egg knowledge so I mention it here!
There are many tips here to consider if you have been having problems previously when sewing velvet.
Walking Foot, Roller Foot
Today we have the luxury of walking or roller feet. Check your sewing machine box to see if you have one. If not go buy one from your sewing machine stockist. They are worth every penny.
So USE A WALKING FOOT TO SEW VELVET is the best MODERN DAY advice anyone can give you.
The machine I've enjoyed sewing velvet on most was a Pfaff with its dual feed mechanism or integrated Dual Feed System or IDT System. Pfaff developed an exclusive system that eliminates fabric slippage where the fabric is fed from above as well as below and at the same rate. So the dual feed system feeds both layers evenly, preventing puckering and shifted layers.
If you don't have a walking or roller foot or a dual feed machine, scour your wardrobe for some tissue paper and place long strips of tissue paper between the velvet pieces and sew the seams through the tissue. The tissue can be torn away once off the machine.
[Update August 2006 - A reader recently wrote to me ' Please let me offer an additional tool: I've decided that wax paper is my new best friend.
I design on it, can affix it to the fabric in a variety of ways, including simply holding it since it does have some grittiness to it, sew right over it, see through it. And, it's easier to remove from the stitches than is tissue paper. It doesn't shred into such teeny pieces.'
So whilst I have not personally tried this method it may work well for you.]
Needles
Next check your needle and change it for a brand new needle. A size 14 ballpoint is probably most versatile especially when you have several thicknesses at facings. But some finer velvets will need a size 11 needle and others will only respond to hand back stitching.
Do several machined sample seams through 2, 3 and 4 layers of fabric, adjusting the pressure and stitch length on samples, before finally opting for hand sewing seams. If your stitch is too short and very close together your needle hole too large you will perforate the velvet and create hole marks that are unsightly.
Test and test to get the stitching right and if you have to do other machine jobs in between work on your velvet project, then make a written note of the stitch and needle size etc.
Be prepared to change to a higher needle size for thicker seams.
If you are still finding the seam sample is poor and your sample should be at least 10 or 12 inches long to get a good idea of hang, then try decreasing pressure on the presser foot.
It can also be useful to machine for about 3 or 4 inches then raise the presser foot and allow the fabric to relax as pressure is eased off and then, replace the presser foot and continue stitching.
Stitching the Seam
Finally stitch the seam slowly and steadily whilst keeping the fabric taut from top to bottom direction of the dress/garment. Do not rush it. More mistakes are made on velvet if you rush.
You must treat it with loving care and it will reward you well. Sewing from top to bottom is best as it's much easier to adjust the hemline area than an underarm bustline area if you do get fabric drag excess fabric at the bottom of a long seam.
Make sure you have a work table to support the weight of the velvet fabric which is heavy. If the fabric hangs off the table it will drag at the seam. Do not race at the seam as if you are knocking up a throwaway fleece item.
Once off the machine run the seam between your thumb and forefinger. On the right side use a pin to pick out any trapped fibres of plush before the steam pressing begins. You may find a suede wire brush useful instead.
Now pressing velvet is whole new game, but all seams should be pressed together LIGHTLY to help knit the stitches together before opening the seam and treating it further.
As the velvet pile is resting against velvet pile this pressing of the seam together LIGHTLY will help get a nice finish. I like to snip the seam on the outer edge at 3 inch intervals, another trick which helps the seam lie that bit better when pressed open. If the seam is curved such snips need to be closer together.
Steaming and How to Iron Velvet
Needleboards
Velvet likes a steamy atmosphere best of all and should never be pressed unless you have a purpose designed velvet needle board or a piece of plush velvet kept solely for the purpose of pressing other velvets.
A needle board prevents the pile of velvet or velveteen from being crushed. The needle board is covered in tiny stainless steel crooked pins about 1cm high which can burrow into the velvet pile and retain the pile as is.
They can be bought from good haberdashers such as MacCulloch and Wallis or Clothilde and usually cost at least £25. I've always preferred those on a soft back that can also be rolled up and used in awkward parts of the garment.
The cheaper alternative to a needle board is to keep a piece of velvet fabric, preferably serged or bias bound to prevent velvet fibres coming out. Place it on your ironing board and press the garment velvet pile into the piece of loose velvet, so that the two layers press pile into pile.
When you press the seams open, place the velvet fabric onto your needle board or spare velvet fabric piece and also place pieces of A4 typing paper between the seam turnover and the main wrong side fabric. This is an extra aid to stop seam edge impressions imprinting lines through to the outer velvet layer.
Don't press on the serged outer edge of your velvet cloth when treating the seams. This should not happen if your velvet press cloth is large enough to cover the ironing board.
Velvet Seam Roll and Velvet Tailor's Ham
You can also make a velvet seam roll using a smooth wooden rolling pin or cardboard tubing from a fabric roll that you have covered with padding and cotton and finally covered with a layer of velvet.

You could too use my tailor's ham pattern here to make a velvet tailor's ham.
Click the thumbnail to make it the correct size to print it to A4 and use velvet instead of cotton as the outside layer.
To make the Velvet Tailor's Ham - Cut 4 ovals of plain white cotton and 2 layers of velvet. Put 2 layers of cotton down on a surface, followed by the 2 layers of velvet placed pile to pile, followed by the final 2 layers of cotton. Machine stitch as shown in the printed out instructions, clip curves, turn through then stuff with wadding and close the small gap with neat hand stitches.
A tailor's ham is very useful for shaping curved seams. To use it don't press the velvet as such, but shape a curved seam on the egg shaped ham and with a wet muslin cloth over your iron tip generate extra steam and finger caress the seam open when the iron is put down.
A wooden clapper can be effective too, to beat a seam open, but be careful you don't damage the velvet pile.
Under Pressing Velvet
If you make a mess of ironing velvet and flatten the pile you have usually caused shine and pile damage that is permanent.
You may be able to revive it with lots of steam and by brushing the pile gently to raise it again. But once the damage is done it is most unlikely it will ever regain its former glory and new sheen may always exist where the over-pressing occurred.
My advice is to take a sample of velvet and deliberately over-press with your iron to see how easy it is to damage and learn just how much steam and pressing you can give your particular velvet fabric without causing damage.
Under rather than over press velvet whether constructing or valeting an item. Try also the freely steaming kettle minus lid method which can be used with a garment on a firm hanger and just let the steam penetrate it.
This works very well too when trying to revive a velvet item when staying in hotel rooms.
Steaming and Pressing Velvet
Velvet likes a steamy atmosphere best of all and should never be pressed unless you have a purpose-designed velvet needle board or a piece of plush velvet kept solely for the purpose of pressing other velvets. A needle board prevents the pile of velvet or velveteen from being crushed. They can be bought from good haberdashers and usually cost at least £25.
I've always preferred those on a soft back that can also be rolled up and used in awkward parts of the garment. Or you can use my tailor's ham pattern here to make a velvet tailor's ham. A wooden clapper can be effective too to beat a seam open.
The cheaper alternative is to keep a piece of velvet fabric, preferably overlocked or bias bound to prevent velvet fibres coming out. Place it on your ironing board and press the garment velvet pile into the piece of loose velvet, so that the two layers press pile into pile.
When you press the seams open place the velvet fabric onto your needle board or spare velvet fabric piece and place pieces of A4 typing paper under the seams. This is an extra aid to stop seam edge impressions too. You can also make a velvet seam roll using a smooth wooden rolling pin or cardboard tubing from a fabric roll that you have covered with padding and cotton and finally covered with a layer of velvet.
A jacket will be much harder to press than a dress with a loose lining. If in doubt, take the garment to be professionally steamed at a cleaners or first try hanging it in a steamy shower room. Affix a hook to the back of your bathroom door, run a hot bath and leave the garment in the steamy atmosphere.
If you make a mess of pressing velvet and flatten the pile you have usually caused shine and pile damage that is permanent. You may be able to revive it which lots of steam and with brushing the pile gently to raise it again. But once the damage is done it is most unlikely it will ever regain its former glory and new sheen may always exist where the over pressing occurred.
Under rather than over press velvet whether constructing or valeting an item. Try also the freely steaming kettle minus lid method which can be used with a garment on a firm hanger and just let the steam penetrate it. This works very well too when trying to revive a velvet item when staying in hotel rooms.
Or use a travel steamer iron and just hover with steam a few centimetres from the fabric surface without touching the actual velvet. The main thing is to avoid touching the fabric with the iron when applying steam. You can also use your fingers to manipulate flatness when there is steam in the velvet.
You can also use your fingers to manipulate flatness when there is steam in the velvet.
A fully constructed jacket will be much harder to press than a finished dress with a loose lining. If in doubt, take the garment to be professionally steamed at a dry cleaners or first try hanging it in a steamy shower room. Affix a hook to the back of your bathroom door, run a hot bath and leave the garment in the steamy atmosphere.
If you have none of these items you may have some success using a velour towel.
This type of towel is often made as a beach towel.
Finishing Velvet Seams Hems
Methods of finishing velvet seams include, overlocking/serging, zigzag stitch and bound seams. For totally lined garments sometimes a row of straight stitching near the raw edge will suffice.
Again if you use a zigzag stitch try not to have the zigzags too close together as it can create heavy unsightly almost embroidered ridges. Use your scraps to make samples and only neaten the seam after pressing.
Fraycheck can be used when making amateur one off wear costumes. Additional edge braids can be attached with Copydex glue for short term stage use.
4-5 cm hems are best worked flat, with the raw edge lightly zig zagged or overlooked. Bias tape is also an option to encase the cut edge. Then sew invisibly by hand. Do not double over a velvet hem which makes for a lumpy thick ugly appearance.
In some circumstances such as a circular or full bias skirt it may be best to keep the hem allowance short at 1.5 to 2cm and after using a fairly open zig zag or overlock stitch then hand sew or machine topstitch the layer of hem slowly and carefully.
Or you could using satin bias binding or bias facings or circular cut fabric facings instead. Again you must judge your fabric and garment.
Stretch velvet fabric can be overlocked or be finished with a stretched curly lettuce frill. For this you must test and trial the fabric finish.
Flaws in Velvet
Never buy or include a flaw in a velvet item thinking you'll be able to repair the flaw.
Flawed velvet is flawed. It is impossible to weave velvet without flaws and unlike tweeds flaws in velvet cannot be made good. These flaws are usually tagged with a contrast thread by the gold lined selvedge.
So just work around them.
If you are desperate for lack of fabric try to incorporate the flaw in facings, in underarm seams, under collars or under patch pockets where the flaw would be more likely to go unnoticed.
How velvet, velveteen and corduroy is made in the weave process is discussed on the Velvets page. The page also include fashion images from Next UK.
Images courtesy of Phase Eight and Boden. Page Added 18 Sept 2005, updated August 2006